What's life like in three dimensions? Let's see as we take a 2D logo to 3D.
We'll start by using the code presented in the three.js introduction "Creating a scene".
This code gives presents you with a 3D rotating cube:
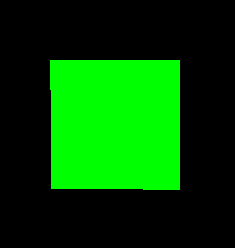
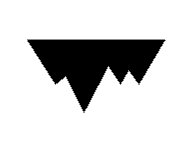
Now, the goal today will be to take the following logo and transform it to 3D:
![]()
To do that, we have the following task list:
- Change the background of the document
- Change the color of the model
- Build a more complicated object
Changing the background of the three.js WebGL document
This is a straightforward task.
In the code, we have:
var renderer = new THREE.WebGLRenderer()
We just need to set the background for the renderer:
renderer.setClearColor( 0xffffff, 1 )
Changing the color of the model
Again, this is a fairly simple task. We have the following code:
var material = new THREE.MeshBasicMaterial( { color: 0x00ff00 } );
That 0x00ff00 is our model's color. Let's change it to 0x000000, black.
var material = new THREE.MeshBasicMaterial( { color: 0x000000 } );
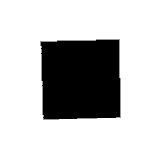
Now we have a rotating black cube:
Building a more complicated object
Low poly wireframe
Now comes the more difficult task.
First, if we want a true low-poly feel we need to be able to see the edges of the object. To do that, we'll need to add another object that doesn't have a fill.
Here's the block of code that builds the cube:
var geometry = new THREE.BoxGeometry( 1, 1, 1 );
var material = new THREE.MeshBasicMaterial( { color: 0x000000 } );
var cube = new THREE.Mesh( geometry, material );
scene.add( cube );
Let's build a wireframe to cover that:
var geometry = new THREE.EdgesGeometry( cube.geometry );
var material = new THREE.LineBasicMaterial( { color: 0x999999 } );
var wireframe = new THREE.LineSegments( geometry, material );
scene.add(wireframe);
Don't forget to rotate the wireframe in the animate function:
wireframe.rotation.x += 0.01;
wireframe.rotation.y += 0.01;
A simple custom geometry in three.js
To get to the logo, we'll have to implement some custom geometry. From three.js documentation on Geometry, here's the most basic example:
var geometry = new THREE.Geometry();

geometry.vertices.push(
    new THREE.Vector3( -2,  2, 0 ),
    new THREE.Vector3( -2, -2, 0 ),
    new THREE.Vector3(  2, -2, 0 )
);

geometry.faces.push( new THREE.Face3( 0, 1, 2 ) );
This codes builds the following 2 dimensional object:
Extracting polygon data from SVG
The next job is to map the verticies on the logo. Luckily, SVG actually has that information encoded.
Here's an excerpt from the SVG file:
Let's pull those points out and add them to the JS:
// convert SVG points to arrays
var points = "0.74609375 43.8305664 14.7998047 21.4208984 19.75 25.8388672 28.6005859 7.48681641 40.6313477 30.5258789 46.0546875 21.4208984 50.8525391 28.7363281 55.0625 21.4208984 68.9990234 43.8305664".split(' ')

var xs = [], ys = []

for (let i = 0; i < points.length; i += 1) {
  if (i % 2 === 0) {
    xs.push(parseInt(points[i]))
  } else {
    ys.push(parseInt(points[i]))
  }
}
At this point, we'll have an array of x values and a corresponding array of y values.
But remember, our cube had dimensions of 2, and this SVG has a max unit of 68. We'll need to scale it down.
Scaling the polygon points
Let's scale the polygon points to a scaling factor of 2, so it's the same size as the cube:
// scale SVG points
const max = points.map(point => parseFloat(point)).reduce((max, curr) => {
  if (curr > max) max = curr
  return max
})
const scalingFactor = 2

xs = xs.map((x) => {
  return (x / max) * scalingFactor
})

ys = ys.map((y) => {
  return (y / max) * scalingFactor
})
Creating the geometry from the polygon points
The final step here is to create the geometry object. We'll need to create the verticies as well as the faces for the object.
To create the vertices, we iterate and add each x,y pair:
// create vertices
xs.forEach((x, index) => {
  const y = ys[index]
  geometry.vertices.push(new THREE.Vector3(x, y, 0));
}
Faces are a bit more complex. A face in three.js is defined by three points: a triangle. For a complex object, there will be many triangles.
Luckily, three.js has a shortcut function to generate these trianges:
// add faces
const vertices = geometry.vertices
const holes = []
const triangles = THREE.ShapeUtils.triangulateShape(vertices, holes);
Now let's add those triangles as faces:
for( var i = 0; i < triangles.length; i++ ){
    geometry.faces.push(new THREE.Face3(triangles[i][0], triangles[i][1], triangles[i][2]));
}
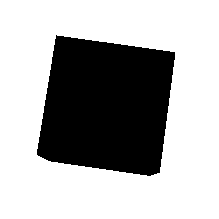
The final product
And, our final product!
Oh, wait. It's upside down. Let's go back and invert the y axis:
ys = ys.map((y) => {
  return -1 * (y / max) * scalingFactor
})
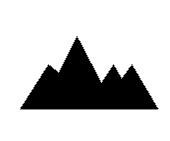
That's better.
And a GIF to show the 3D rotation:
Next steps
To complete the project, we'll need to take care of the following steps:
- The object isn't centered at the moment; we'll need to take the points from the SVG and center them.
- We need to add the third dimension!
- We need to add the moon, which is missing at the moment.